This Halloween wall hanging is a fun project and it's easier than you may think. It's a great way to use up fabric scraps, some orphan jelly roll strips and batting remnants.
"Boo!" Wall Hanging Tutorial
by Andy Knowlton
(Finished wall hanging is 12" x 47")
Supplies Needed:
6 strips of various fabrics that are 2.5" x 19.5"
1 fat quarter of print fabric for letters (or a piece that is at least 6" x 20")
Solid black fabric: 1/4 yard
Medium ric rac (black): 3-1/4 yards
Backing: 3/8 yard
Batting: 3 squares that are 12.5"
Heat n' Bond Lite or similar product
thin dowels (you need 3 that are about 11.5" long. I used 3 wooden skewers - the kind that are used for grilling and are found in inexpensive packages at the grocery store. They're
perfect!
Letter Template (
download and print from here)
Other supplies to gather:
pencil
scissors - nice and sharp!
rotary cutter and mat
iron
Steps:
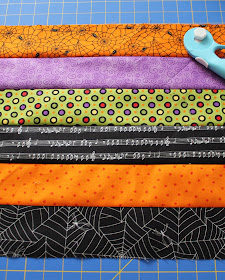
1. Using a 1/4" seam, sew all 6 strips together to form a rectangle that is 12.5" x 19.5" Press seams to one side.
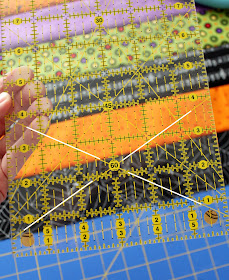
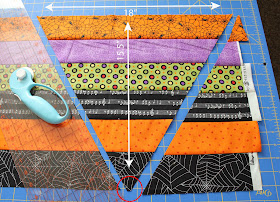
2. Cut rectangle vertically into strips that are 3.25" wide. You will be able to get 6 strips.
3. Cut solid black fabric into 3 rectangles that are 7" x 12.5"
4. Cut medium ric rac into 6 segments that are 13" long each.
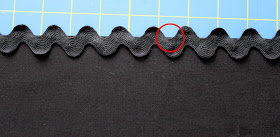
5. Line up the ric rac with the 12.5" edge of the solid black rectangle. Align the edge of the fabric with the dip in the ric rac (see photo)
6. Place one of the colored strips right-side-down on top of the ric rac, also aligning fabric edge with the dip. The edge of black fabric and edge of colored strip should be even. Pin in place, being careful to catch both fabrics and the ric rac in the pins - this will help hold everything in place until you stitch.
7. Stitch, using a 1/4" seam.
8. Open and press seam so that the ric rac folds to the outside.
9. Repeat until all three blocks look like this:
10. Carefully trim the ends of the ric rac that extend past the edge of the block.
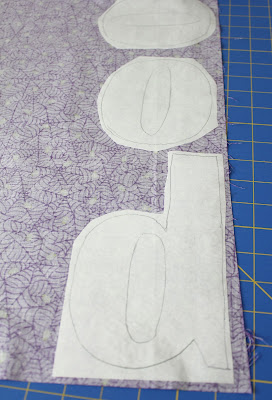
11. Using the letter template, trace the letters onto a piece of Heat n' Bond lite. Be sure to trace the "b" as it shows on the template. I know it looks like a "d" trust me though- it needs to be a mirror image during this step!
12. Cut out letters using sharp scissors. At this step the letters do not need to be cut out perfectly. Leave some space around each letter.
13. Following the manufacturer's instructions, fuse each letter to the WRONG side of the fabric. Using sharp scissors, carefully cut out letters (this time cut right on the lines!)
Remove the paper backing from each letter:
14. Lay out all three of your blocks and decide how you would like to place your letters.
You could do a wonky version:
...or all lined up
Once you are happy with your letter placement, (again using manufacturer's instructions) press each letter in place.
15. Using a coordinating thread, top stitch each letter in place. I just used a straight stitch, but a zig zag or blanket stitch would be cute.
16. Cut your backing and batting squares - you need three of each that are 12.5" square. Working with just the two "O" blocks, you're going to make a quilt sandwich. First place your square of batting down, then place your block (right side up) and then place the backing square (right side down.) Pin several times around the square to hold everything in place.
17. Sew (1/4" seam) all the way around, pivoting at each corner and leaving about a 4" opening on one side for turning.
18. Trim corners.
19. Carefully turn right-side-out, and push out the corners using a bone folder. Press edges flat.
20. Take your thin dowel and insert it into the block between the batting and the backing. Push the dowel until it is flush with the top. (If you are using wooden skewers like me, then you'll need to trim off the pointy end and wrap the end with a bit of tape.)
21. Find the opening in the block, press the raw edges in and whip stitch it closed.
22. With the thin dowel pushed all the way to the top of the block, top stitch along the sides - just inside of the ric rac. Begin at the bottom of the block and sew up as far as you can without hitting the dowel. This top stitching will hold the dowel in place, anchor the backing in place and add a bit of detail to your finished project.
23. For the "B" panel, you will need your backing and batting as well as a piece of ric rac that is about 18" long. Place the batting down, place the block (right side up) on top of that. Place your length of ric rac as shown in the photo below BUT move the ends in a bit to where the red circles are. This ric rac will become the hanger for the wall hanging and it hangs much better when it is connected closer to the center - I discovered this the hard way :)
24. Carefully place the backing square right-side-down and pin in place, making sure to pin the ends of the ric rac as well. Stitch as you did before (1/4" seam) around the block, leaving a 4" opening. Clip corners and turn block, pushing out corners. Press.
25. Insert thin dowel as you did before, press raw edges of the opening and whip stitch closed. Push the dowel to the top and top stitch as you did with the other two blocks, stopping when you get close to the thin dowel.
26. Now we will connect the three blocks with the remaining ric rac. You'll need four pieces of ric rac that are 5" each. Lay out your blocks on a flat surface, right sides down. Pin two pieces of ric rac to the bottom of the "B" block, lining them up on the line of top stitching. Pin in place.
27. Flip block over and stitch again on the same top stitching line, making sure to catch the ric rac end in your stitching.
This is what it looks like from the backside:
28. Lay "B" block face down on a flat surface and line up your first "O" block underneath that. You want about a 2-1/2" space between the blocks. Pin the bottom of the ric rac to the back of the "O" block, lining it up with the top-stitching line. Carefully measure both pieces of ric rac to be sure they are exactly the same length. If they are off, your wall hanging will be a bit crooked. Flip blocks over to the front and stitch the ric rac in place, again following the previous top-stitching line.
29. Repeat steps 26-28 to add the last "O" block.
Your wall hanging is ready to hang! The finished size is about 12" x 47" which is a great size for an entryway or at the end of a hallway. If you make a Boo wall hanging we'd love to see it!

