Showing posts with label Bags. Show all posts

Thursday, February 12, 2015

Charming Tote Bag Pattern

Charming Tote 

If you’ve been in the shop in the last few days you may have noticed our new tote bag greeting you! 

This pattern is called “The Charming Tote” and it's designed by Carol Lawson – our very own Bag Lady.

Charming Tote pattern

Carol designs such cute bags – we have all of her patterns and many of the bags are hanging as displays in the shop.

Right now we also have some of these sweet zip bags available from Riley Blake. One of these zip bags filled with a few sewing notions would make a great gift for a sewing friend! 

zip bags


Wednesday, December 17, 2014

The Cutaway Tote Bag pattern

 Are you still on the hunt for the perfect Christmas gift for a certain someone?  Or maybe you’re all done with your shopping and you’re ready to do some fun sewing for yourself (lucky you!)  Well a Cutaway Tote Bag is perfect for either situation.

 The Cutaway Tote Bag

This cute tote bag pattern was designed by our very own Carol Lawson!  I just love the silhouette of this bag – and it has plenty of pockets, like a great bag should!

The Cutaway Tote Bag

The pattern is now available on the pattern wall at the shop.

The Cutaway Tote Pattern


Friday, November 28, 2014

The Princess Purse Went Wild!

 Love animal print fabrics?  Well then you’re going to love this new bag and kit that we have at the shop.  The bag is made using a pattern called “The Princess Purse” but we have re-named it “The Princess Purse Went Wild” – just take a look:

Princess Purse went wild 2

We have kits available for this bag for $31.  The pattern is included in the kit. 

Princess Purse went wild

And of course we carry the pattern on it’s own as well, if you’d like to choose your own fabrics for your Princess Purse! (See a different version of the Princess Purse here.)

Princess Purse went wild pattern


Wednesday, November 12, 2014

Simply Stylish bag and pattern

Simply Stylish bag pattern by Carol Lawson

We have a new bag on display!  This bag is made from a pattern called “Simply Stylish”, written by our very own Carol Lawson (Bag Lady Creations).  I just love those fun, bright colors!

Simply Stylish bag pattern by Carol Lawson

Do you love making bags and totes?  I’m pretty new to the bag/tote making thing, but I’ve made a few!  We have a Pinterest page full of fun tutorials for bags, totes and purses.  Check it out here!  And to see more of Carol’s fabulous bag patterns stop by The Fabric Mill!


Tuesday, January 14, 2014

The Princess Purse pattern and kit

Are you in need of a new bag this winter?  I know I am!

The Princess Purse pattern by Bag Lady Creations - pattern available at The Fabric Mill

The Princess Purse is a pattern from our very own Carol who writes patterns under the label “Bag Lady Creations.”  We have a display bag hanging in the shop so you can see the size, pocket placement and handle lengths to get a good feel of what your finished bag will look like.  I love that! 

This black and yellow version of the Princess Purse is sure to add brightness and cheer to those gray January days.  We have kits available, or you can buy just the pattern and put together your own fabrics.

princess purse kit

The kit is $35.95 and includes the pattern so you can make a bag for yourself and another one for your mom or sister for Mother’s Day!

Monday, December 9, 2013

Gift idea: snap bags!

snap bag tutorial

Every year there are a couple of people on my list that are SO difficult to buy Christmas gifts for.  This year two of them are women and I’m just racking my brain trying to think of something meaningful, thoughtful, and/or useful to give.  Can you tell I’m a fairly practical gift giver?  I try to give handmade gifts when I can and so when I saw this great snap bag display that Laura made I knew this fit the bill! 

Laura used three prints from the Winter’s Lane fabric line from Moda to make this snap bag. 

Have you seen these?  They are so clever!  The top closure is made using metal tape measure pieces.  Next time you stop by the shop be sure to go and check out this bag.  It’s so fun to play with. 

snap bag tutorial

These bags are easy to open and close --perfect for little fingers or also for adults who have difficulty with the pinching motion that zippers and snaps require.   

I found two fantastic (and free!) snap bag tutorials for you:


These two tutorial as well as 20 other great bag, tote and purse tutorials can be found on our pinterest board!  It’s full of great gift ideas.  Go check it out, find your favorite tutorial and then stop by the Fabric Mill and we’ll help you pick out the perfect fabrics for your project. 

Tuesday, June 25, 2013

Red Riding Tote–tutorial

I am loving the Little Red Riding Hood fabrics from Riley Blake.  This "little border" print was just begging to be made into a tote bag!  The bag finishes at 9" x 9" x 3" which is the perfect size for your favorite 3-7 year old young lady:

Little Red Riding Hood tote bag tutorial

and is just right for carrying a few favorite books and a beloved friend on a trip to Grandma's house:

Little Red Riding Hood tote bag tutorial


Red Riding Tote tutorial
by
Andy Knowlton


Red Riding Tote tutorial from the Fabric Mill


Materials Needed:

3/4 yard of Little Red Riding Hood “Little Border” print (Riley Blake)**
1/8 yard of one coordinating print (this is optional)
two (11” x 13”) pieces of fusible fleece

**this is the “little border” print.  The print is currently available in both red and pink at the Fabric Mill.**
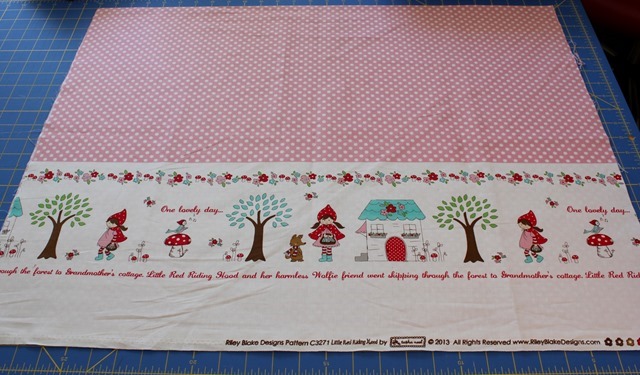
red riding hood little border pink

Step 1:  Take the 3/4 yard of “Little Border” print and unfold it.  Line up your ruler so that the 1/2” marking line lies directly under the line of words (see photo.)   Trim along that edge.

tote 1

tote 2


Step 2:  Following the cutting diagram, cut all of the following pieces

2@ 13” x 19” (with the border along the 13” edge)
2@ 4” x 18” for handles
2 @ 3.5” x 13” for bag bottom (option: this can be cut from a coordinating fabric instead)

cutting layout


Step 3:  Using a 1/4” seam, sew the two 3.5” x 13” bag bottom strips to the bottom edge of each of the 13” x 19” main bag pieces.  (I used a coordinating fabric for the bag bottom.)  Press seam.

Tote Bag tutorial


Step 4:  Fuse the 11” x 13” piece of fusible fleece to the wrong side of each of the main bag pieces.  The fusible fleece needs to be on the bottom half of the bag.

 Tote Bag tutorial


Step 5:  Place main bag pieces right sides together. 

tote 6

Be sure that these lines (printed on the fabric) match up. 

tote 7

Pin around the bag along the edges.  Along the top edge we will be leaving about 5” open (unsewn).  I like to mark those spots with double pins to remind me not to stitch there.

Tote Bag tutorial

Using a 1/4” seam, Sew around edge of bag, pivoting at corners and leaving about 5” open for turning.


Step 6:  To create the flat bottom on this bag, on one corner match seam line to seam line and mark 1.5” down from the point.  Sew along the marked line (which should measure about 3” long). 

Tote Bag tutorial

Repeat for all four corners:

Tote Bag tutorial

Then trim each corner about 1/4” from stitching:

Tote Bag tutorial

Step 7:  Turn bag right side out and push out each corner:

Tote Bag tutorial

Step 8:  Sew the 5” opening closed by pressing first and then carefully sewing along the edge.

Tote Bag tutorial

Step 9:  Push bag lining into bag, press along top edge of bag and then stop to admire your handiwork thus far!
Red Riding Hood tote bag tutorial


Red Riding Hood tote bag tutorial

Step 10:  Now for the handles!  Press up 1/2” on each end of both handles:

Red Riding Hood tote bag tutorial

Fold (and press) in half lengthwise.  Then unfold and press the outside edges in to the center. 

Red Riding Hood tote bag tutorial

Then fold again on center line and press:

Red Riding Hood tote bag tutorial

Step 11:  Sew along each edge of the handles a scant 1/8 from the edge:

Red Riding Hood tote bag tutorial

Then sew down the center of each handle:

Red Riding Hood tote bag tutorial

Step 12:  Pin the ends of the handles to the inside of the tote bag, 2.5” from the side seam. 

Red Riding Hood tote bag tutorial

Stitch handles in place, making sure to use a coordinating thread because this will show on the outside of the tote!

Red Riding Hood tote bag tutorial

Little Red Riding Hood tote bag tutorial

Your lovely tote is complete and ready to be used and loved!


Friday, March 22, 2013

Fit For a Queen–Diaper Bag kit and pattern


A diaper bag that is surely “Fit for a Queen!” 

Cute diaper bag pattern: Fit for a Queen

Carol has done it again!  This diaper bag pattern is the perfect diaper bag for any mom – new or uh, experienced (we won’t say “old”.) 

The pattern is available on it’s own or also in this cute kit:

Cute diaper bag pattern: Fit for a Queen

Know an expectant mother who loves to sew?  This bag kit would make a fantastic gift. 

The kit $46.00 and is available in the shop or also by ordering over the phone: (801) 225-3123

Wednesday, September 19, 2012

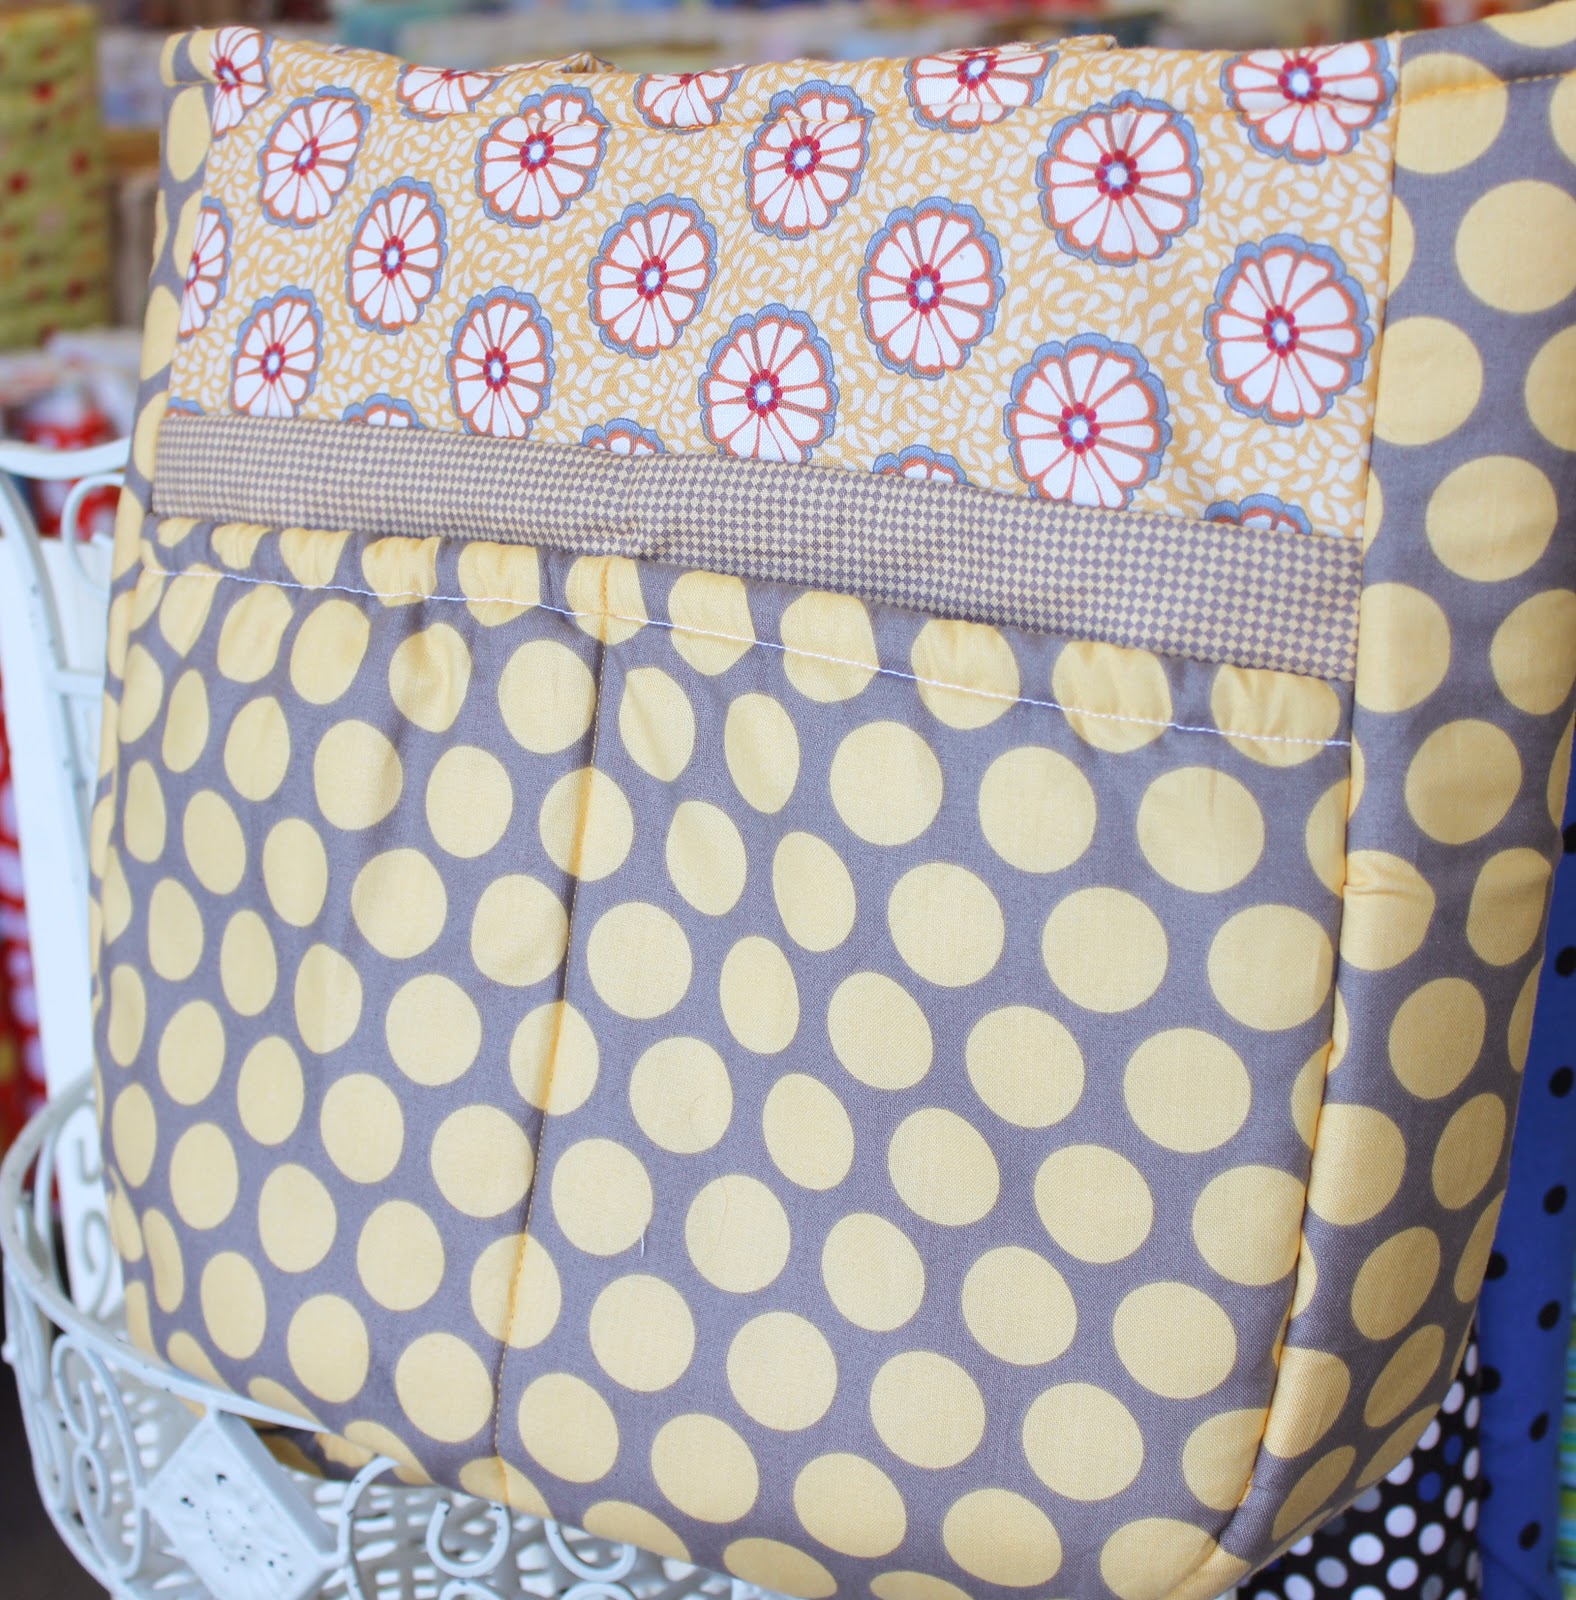
The Blossom Bag + Kit

Need a new bag for Fall?  I have the perfect one for you AND it's available as a kit!

The Blossom Bag was designed by the very talented Carol Lawson.


I love the details she designed into the bag - the padded straps with the D-rings:


And all of the many pockets - on the back....


 ...and more on the front!  (I can't have too many pockets on my bags -they get filled so quickly!)


The Blossom Bag kit includes the fabric, buttons, metal rings, elastic and pattern - everything you need except the fusible fleece!  The kit is $39.50 and is available in the shop or through ordering by phone (801)-225-3123


Saturday, September 1, 2012

Trick or Treat Bag Tutorial


Trick or Treat Bag Tutorial from The Fabric Mill Blog


Trick or Treat Bag Tutorial
by Trisha Weekes


Materials needed:
½ yard of outside fabric
½ yard of liner fabric
1 fat quarter of choice
*optional-2 yards of jumbo ric-rac
Thread

note:  please read through all steps before beginning any project

Step one:
Start by squaring up your fabric, making sure you have 2- 18”x42” rectangles (18”x21” folded) removing the selvedge edges.

From the fat quarter cut 2- 4”x22” strips, these are for our handles.

Trick or Treat Bag Tutorial

Step two:

(a)  Fold the 4”x22” strips in half lengthwise, right sides together. 
(b)  Sew a ¼” seam lengthwise down both strips of fabric. 
(c)  Open and Press seams.
(d)  Turn each strip so right sides are out. 

Trick or Treat Bag Tutorial

Press so the seam is running down the middle, turn over and top stitch ¼” on each side of the handle. Repeat until both handles are complete.


Trick or Treat Bag Tutorial


Step three:

Pin handles onto the top outside of selected fabric, at 8” in and 14”in from the side. You want the seam on the handle to be facing the liner fabric. Fold fabric over and using the first handles as a guide pin the other handle to the other side. Then place the lining fabric to the outside of fabric (right sides together) and sandwich the handles between the two fabrics. 


Trick or Treat Bag Tutorial


Pin, then sew a ¼” seam along the top of both fabrics, back stitching over the handles to secure them between the two fabrics.


Trick or Treat Bag Tutorial


Step four:

Open and press this seam, then fold the fabrics in half lengthwise (right sides together still). Liner fabric facing liner fabric and outside facing outside. Sew a ¼” seam down the side.  Open and press this seam. 


Trick or Treat Bag Tutorial


Fold back over the outside fabric (so the right sides out), line up the raw edge of the outside with the bottom of raw edge of the liner fabric (wrong sides together). At this step you have the option to add a heavy interfacing to the bag, we've left it out of our bag. Sew a ¼” seam around the bottom opening, just the two layers not the four total layers.  Then zig-zag stitch the raw layers to prevent fraying.


Trick or Treat Bag Tutorial


Step five:


Now we're going to create the border at the top of the bag, by shifting the two fabrics about 2”. By doing this it creates a unique layer, we get to see the liner fabric at the same time as the outside, but also creates the bottom of the bags guides and seams. 

*Please note: that with my fabric, the liner fabric as seen from the outside of the bag is going the right direction, but when looking down into the bag it is upside down. If you have chosen a directional print you will need to sew your liner fabric upside down in the previous steps as well*


Step six:

Open up the bottom opening and fold it on the seams, fold in the ends like you would a present, forming a triangle on both ends. 


Trick or Treat Bag Tutorial

With a ruler and pencil we're going to mark the sides- line up the ruler with the triangle to the top of the bag and make a light line. Do all four sides; after the first two, flip it over refold triangles and draw lines.


Trick or Treat Bag Tutorial


Fold and sew an 1/8” seam down each of the lines drawn.


Trick or Treat Bag Tutorial

Step seven:

Fold the bag in half horizontally, lining up side seams and handles. Turn the bag inside out so the liner is facing out.  We're going to sew up the bottom- line up the fabric (should be the outside fabric folded over, no raw edges). 


Trick or Treat Bag Tutorial


Sew a ¼” seam, then zig-zag stitch to reinforce the bottom.


Trick or Treat Bag Tutorial


Step eight:

Open up the bottom seams again, with the triangles poking to the outside of the bag. Along that seam you're going to sew, this will create the bottom sides of the bag. Repeat on the other side. 


Trick or Treat Bag Tutorial


Next we'll fold in the triangle and following the seam we'll stay stitch the triangle in place on the bottom of the bag. Repeat on the other side.


Trick or Treat Bag Tutorial

Trick or Treat Bag Tutorial


Step nine:

Back up to the top of the bag, we're going to top stitch (¼”) around the top and top stitch the handles down to the bag. 

Trick or Treat Bag Tutorial

Next stabilize the handles by making X's as shown in the picture. 


Trick or Treat Bag Tutorial


The ric-rac is optional, if you want you can leave it off. To add the ric-rac, line it up with the outside/ liner seam starting at a side, stitch through the middle of the ric-rac securing it to the bag all around the bag.


Trick or Treat Bag Tutorial


Step ten:

Give this bag to a kid, who is willing to go door to door and ask for a trick or a treat! Enjoy a bag full of treats!


Trick or Treat Bag Tutorial