Saturday, December 29, 2012

iPad Cover Tutorial

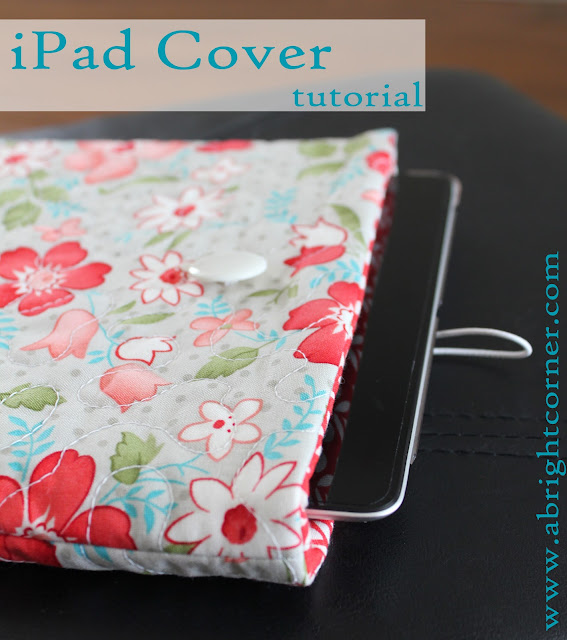
Did you or a family member become an iPad owner this Christmas?  Then you'll need one of these!  I've had one of these quilted iPad covers for awhile and I love it.

This particular cover is what I would consider a comfortable size.  This is not a tight-fitting cover.  I wanted it to be easy for my kiddos to use this.  I can grab it on the way out the door and quickly slide the ipad in without a struggle.  The elastic closure and button ensure that the iPad is snug inside and well protected.  If you would like this to be a tight fit, increase your seam allowance to 1/2".

iPad cover tutorial

iPad Cover Tutorial
by
Andy Knowlton


Materials Needed:
2 Coordinating Fat Quarters
button
6" or so of thin elastic
thin batting

Cutting Instructions:
  • From one of the fat quarters (this is for the cover lining/inside) cut 2 pieces that are 9.5" x 11.5" and then two pieces that are 4" x 10" (this is for the pieced outer cover)
  • From the second fat quarter cut two pieces that are 9" x 10" (This is also for the pieced outer cover).
  • Batting: Cut two pieces that are 9.5" x 11.5" and two that are at least 10" x 12"


iPad cover using fat quarters


Step 1:
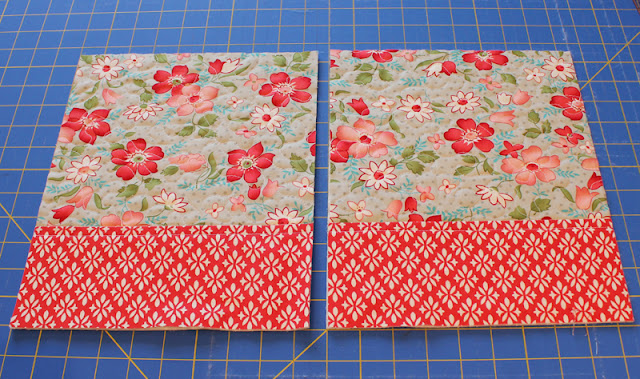
We will first make the outer cover.  Sew each of the 4" x 10" pieces to the 9" x 10" pieces.  Press. 

Step 2:
Place the outer cover pieces over the batting pieces that are 10" x 12."  Baste using a few basting pins or using a bit of basting spray.  

iPad cover using fat quarters

Quilt as desired, then trim both pieces to be 9.5" x 11.5"

iPad cover using fat quarters

Step 3:
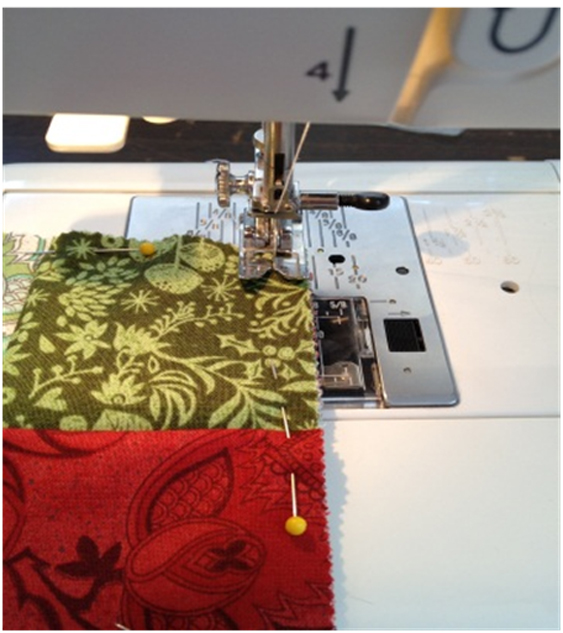
Place the two outer cover pieces together (right sides together) and pin.  Be sure to line up those seam lines (see photo below).  When you get the cover finished it will be obvious if these seam lines are not matched up.  Sew the two outer cover pieces together (using a 1/4" seam) along the sides and bottom, pivoting at the two bottom corners.  Leave the top open.  Clip the corners to reduce bulk.

Turn outer cover right-side-out.  Gently push out the corners (I use the tips of a blunt-edge pair of scissors.  A car key would work as well.)

iPad cover using fat quarters


Step 4:
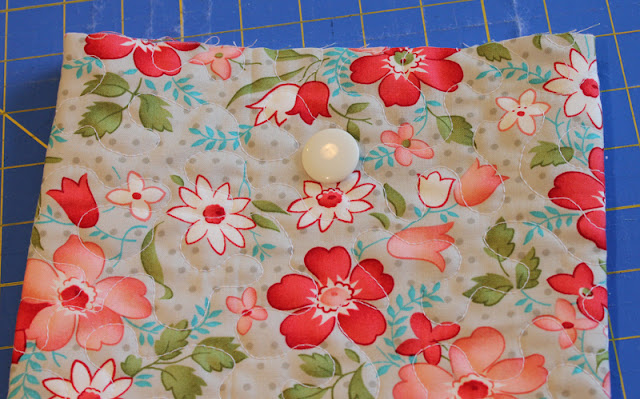
Sew on your button in the center of one side and about 2" down from the top edge.

iPad cover using fat quarters

Step 5:
Now we are going to work on the lining.  Layer a piece of batting, then one of the lining pieces (right side up), then another lining piece (right side down), and then the final batting piece.  The two lining pieces should be right-sides-together with the batting pieces on the outsides.  Pin together around all edges.

iPad cover using fat quarters

This next step is optional - but I find it helpful!  At the bottom edge of the batting, cut a notch out that is about 5" long and about 1/4" high.  Trim JUST the batting - not the lining fabric.  Repeat for both pieces of batting.  (Cutting this notch will help reduce bulkiness when you are stitching the opening closed.)

iPad cover using fat quarters

Sew 1/4" seam along the sides and bottom of the lining/batting sandwich, stopping at the notched section of batting (or at about 2" in from each side.)  Leave the notched section unsewn - this is where you will turn the cover right-side-out.  Leave the top open as well.  Clip the corners to reduce bulk.

Step 6:
Place the outer cover (right side out) inside the lining so that the two (inner and outer cover) are right sides together.  

Match side seams and pin in place all along top edge.  

Measure the amount of elastic you will need (this depends on the placement and size of your button).  Place the piece of elastic loop-side-in, between the lining and outer cover on the opposite side of where the button is.  Pin elastic in place.

iPad cover using fat quarters

Step 7:
Sew (using 1/4" seam) around the top edge of the cover, catching the ends of the elastic.  After you have sewn around the whole top edge, trim the ends of your elastic.  Mine were obviously WAY too long. 


iPad cover tutorial

iPad cover tutorial


Step 8:
Through the opening in the bottom of the lining (remember that notched section of batting?) turn the cover right-side-out.  Find the bottom edge of the lining that is unsewn.  Fold the raw edges in about 1/4" and stitch the opening closed.  This is where the notched batting helps reduce bulk and make this stitching easier.  


iPad cover tutorial

Step 9:
Push the liner inside of the outer case.  Reach in and push the corners in and smooth the liner so that it lays flat inside of the cover.  I like to press the edge of the top opening to help it to lay flat as well.  

iPad cover tutorial


iPad cover tutorial

And there you have it-- a personalized iPad case to take with you everywhere you go!  I love mine so much, but the guys in my family had a problem with the flowers.  So I made a more masculine version to appease them.  

iPad cover tutorial


Wednesday, December 19, 2012

Holiday Mug Rug Tutorial

How are your Christmas projects coming along?  Are you still looking for a few last minute gifts - maybe a quick handmade item for a teacher or favorite neighbor?  Today's tutorial would be the perfect thing!

Trisha has written a tutorial showing you how she created her Holiday Mug Rugs (on display at the store.)


Holiday Mug Rug tutorial
by
Trisha Weekes


Materials Needed:

1 Pack of Charm Squares- I used Blitzen by Basic Grey for Moda (or 5” square scraps)
Coordinating Thread
Batting remnants 5” squares *optional

This project is both quick and cute! 

Step one- Opening the charm square is probably the hardest part for me, not because it’s physically impossible, but I just like to see them stacked together all nice and pretty! Anyone else have that problem? Anyhow, choose 5 squares that you like together, 1 for the back and 4 for the front. Put your favorite in the middle face up, and the four to each side; like shown in the photo. If you want to add the batting, do so now, underneath your middle square.

Holiday Mug Rug tutorial - quick and cute!

Step two through four- You’re going to fold the fabric from each side in half and place it on the middle square with the fold towards the center of the square and all the raw edges facing out. Pin at each corner.


Holiday Mug Rug tutorial - quick and cute!


Holiday Mug Rug tutorial - quick and cute!

Holiday Mug Rug tutorial - quick and cute!

Holiday Mug Rug tutorial - quick and cute!


Step Five- When all 4 squares are folded and pinned, Lift up the first fold and tuck in the fourth fold, like when closing a box. Pin again.

Holiday Mug Rug tutorial - quick and cute!


Holiday Mug Rug tutorial - quick and cute!


Step six-
Next I pin all 4 sides, just to make sure nothing slips as I sew. It’s optional. Sew all around the square, no need to leave an opening for turning, it’s in the middle!

Holiday Mug Rug tutorial - quick and cute!

Holiday Mug Rug tutorial - quick and cute!


Step seven-
Trim the corners and threads.  I trim quite a bit, to reduce the bulk at the corners.

Holiday Mug Rug tutorial - quick and cute!


Step eight-
Open the center folds and turn inside out, with a bone folder push out your corners. You have 5 layers of fabric, 6 if you choose batting; you want a nice creased corner. Top stitching is also optional.

Holiday Mug Rug tutorial - quick and cute!


Holiday Mug Rug tutorial - quick and cute!

Ta-da! You’re done! Simple, easy and oh so cute! A packet of charm squares will yield 8 mug rugs. Package with some packets of hot cocoa, maybe a new mug, and voila a great gift to give to neighbors or friends. Enjoy!

Holiday Mug Rug tutorial - quick and cute!


Friday, December 14, 2012

Thomas the Train Fabrics!

Each year my family has a Christmas Eve tradition which I know is shared by many other families - the kids get new pajamas (sometimes handmade, sometimes not!)

Right now I'm on the hunt for the perfect fabrics to use for my boys' pajama pants.  I'm thinking some of these Thomas the Train prints would be PERFECT for my youngest!  

These are the "Who's That Train" fabrics from Quilting Treasures:


These would also make a great throw-size quilt for any young Thomas fan!  

Here's a link to a free pattern for this cute quilt (73" x 86") found on www.quiltingtreasures.com
Print out the pattern and then stop by the shop to grab all of the fabrics that you'll need.
What little boy wouldn't love to find this under the tree Christmas morning?


  Also in the collection is this panel:


and I love this print that has the names of the engines:


Wednesday, December 12, 2012

Ruffle Christmas Stocking Tutorial

Here is another addition to our Handmade Holidays feature!  This beautiful Christmas stocking is made using  ruffle fabric and a flannel lining.  Don't be intimidated by the ruffles!  Trisha has some tips (below) for sewing with ruffle fabric.  


Ruffle Stocking Tutorial

Ruffle Christmas Stocking tutorial
by
Trisha Weekes


Materials Needed:
24" or 2/3 yard of Ruffle fabric
24" or 2/3 yard of flannel (for lining)
matching thread

Notes:  
When sewing with ruffle fabrics the key is to always be checking and making sure your ruffles are laying the direction you want them to be.  I also get a lot of questions about is it hard to sew with the ruffle fabrics?  Do I need a special needle or a serger?  I have a simple machine; I tried setting it on all the recommended settings for knits, bu tot be honest - no difference!  I have an all-purpose needle and regular settings.  Maybe your machine is a little pickier than mine.  If you run into problems please post them and I'll help you trouble shoot!

This pattern yields 2 matching stockings!  The ruffles run the length of the fabric and not the width, so to get the ruffles laying horizontally, you need to purchase 24".  The width of the fabric varies from 46" to 48" so you have the width to make 2.  Bonus, huh?

Step 1
Go to the Fabric Mill in Orem purchase the pattern, and cut out your stocking out of the lining fabric.  (Not sure if you can purchase the pattern online and we can mail it to you, but if there's an interest, leave a message and we'll look into it.)  For this step the cutting layout is simple, just lay the pieces out and cut.  To create the stocking hang tab, cut out the 2.5" x 6" piece, crease a fold down the middle of the 6" length, fold in the raw edges to this middle crease.  Sew a 1/8" seam down, and set aside.  In step 5 you'll fold it in half and insert into the seam of your stocking.

Step 2
Lay your lining pieces over the ruffle fabric.  I positioned mine just below the top ruffle.  Pin in place, again checking to make sure your ruffles are laying flat and where you want them.  See photo for layout.

Ruffle Stocking Tutorial


Ruffle Stocking Tutorial


Ruffle Stocking Tutorial


Lay the pieces back to back, right sides together, pin in place.  Trim excess. I also found it easier to cut by going down with the ruffles, than up and against them, you decide.

Step 3

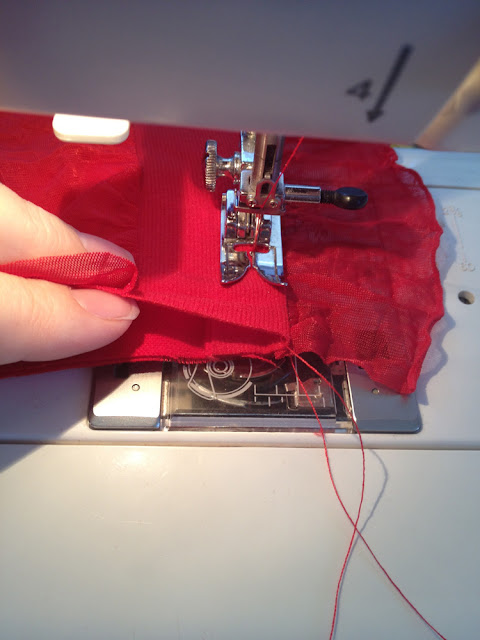
With right sides still together, sew a line across the top of each stocking, following the natural line that is in between each ruffle. Next flip the lining back over, pull forward the top ruffle. Sew a stay stitch across the top of the stocking.  


Ruffle Stocking Tutorial


Ruffle Stocking Tutorial


Step 4


Every couple ruffles lift the ruffle and stay stitch the ruffle fabric to the liner fabric. This really helps give it body and shape. Repeat until both sides of the stocking are done. 


Ruffle Stocking Tutorial


Ruffle Stocking Tutorial


Ruffle Stocking Tutorial


Hopefully in these pictures you can see the stitching.

Step 5

Next pin the two stocking pieces together, again pay attention to the lay of the ruffles. Make sure when you’re pinning you also remember to insert your stocking tab at the top of the heel side, so you can hang it! I sewed a ¼” seam all around the foot of the stocking. I then used my pinking shears to cut off the excess; these also help to make my curves lay flat.

Ruffle Stocking Tutorial


Ruffle Stocking Tutorial


Step 6

You could leave it as it is, turn it inside out and be done but I’m a nut when it comes to raw edges. I finished mine off by zig-zagging all around the foot again.


Ruffle Stocking Tutorial


Gorgeous Christmas stocking using ruffle fabric!


Hang up and enjoy your new ruffle stocking!


Monday, December 3, 2012

Advent Calendar (panel) tutorial

As promised, here are the step-by-step instructions for this cute Advent Calendar.  Even though December has begun, it's not too late to whip this project together.  We have everything you need for this advent calendar at the shop.  It is a quick project, especially if you have your favorite Christmas music to keep you company!  

The finished calendar measures about 18" x 27"

Quick and easy handmade advent calendar

You'll need 1 panel (Happy Christmas by Northcott Fabrics), backing fabric and some thin batting.
(Some brief instructions are included as part of the panel as well.)

Step 1: Cut out the main panel piece and each of the pocket squares:

Advent Calendar Northcott fabric panel


advent calendar

Step 2:  On each pocket square there are dotted lines:

advent calendar

 Fold down the top of each pocket, right on the dotted line.  Press well with an iron to get a nice, crisp fold:

advent calendar

Step 3:  Next, fold that same raw edge down once more so that the raw edge meets the ironed fold:

advent calendar

Then fold over along that pressed edge.  This encases that raw edge:

advent calendar tutorial

Top stitch along this edge.  I used my 1/4" foot and it worked perfectly.
(note: use a coordinating thread for these next few steps.  All of the stitching on the pockets will show on your finished calendar.)

advent calendar tutorial

advent calendar tutorial

Repeat for all other pockets:

advent calendar tutorial


Step 4:  Press under 1/4" on sides and bottom of all pockets.  Press.

advent calendar tutorial

Step 5:  Place each pocket on its corresponding square and pin in place.  

advent calendar tutorial

Top stitch on the sides and bottom of each pocket, leaving the top open.  I recommend that you back stitch well at the two top corners.


advent calendar tutorial

All pockets are in place!

advent calendar tutorial

Step 6:  Cut your backing fabric and batting to be the same size as the top.  Layer the batting, backing (right side up) and top (right side down.)


advent calendar tutorial

Pin in place along all edges, leaving a 7" or 8" section open for turning:

advent calendar tutorial

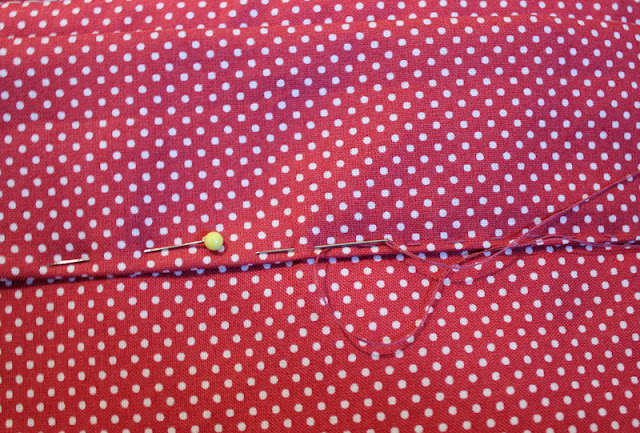
I usually mark the part I want to leave open with double pins to indicate my stopping and starting points:

advent calendar tutorial

Step 7:  Sew around outside of calendar, pivoting at corners and watching for your 7-8" opening.  I used a 1/4" seam but there is some wiggle room here if you prefer a 1/2" seam. 

Step 8:  Turn calendar right-side-out.  Press and sew the opening closed.  I used a coordinating thread and an invisible stitch:

advent calendar tutorial

Step 9:  At this point you can just press the calendar well and be done.  I chose to do some straight-line quilting between each of the pockets and around the outside edge of the entire calendar, about 1/2" in from the edge.  

advent calendar tutorial

The straight-line quilting goes quickly (especially with a walking foot) and adds a nice finished look.

advent calendar Northcott fabric panel

Step 10:  This is an optional step, but I added a hanging sleeve to the back.  Cut a piece of backing fabric about 15" x 5".  Fold ends in about 1/2" in and press.  Then fold sleeve in half lenghwise, right sides together.  Sew, using 1/4" seam (you can see in this photo the ends that have been folded in and pressed:)

advent calendar tutorial

Turn right-side-out and press along seam to help it lay flat.  

Step 11:  To place it on the backing, find the center point of the calendar and the center of the sleeve.  Mark both with a pin.  Matching those center points, pin sleeve to the advent calendar being sure to keep the sleeve evenly spaced from the top of the advent calendar.  If the sleeve is sewn on crooked, the advent calendar will hang crooked - don't ask me how I know :)  

advent calendar tutorial

Step 12:  Using a needle and thread sew the sleeve in place.  Be sure your stitching does not go all the way through to the front of the calendar - just catch the batting and the backing in your stitches.

advent calendar tutorial


Your advent calendar is ready to hang and use!  Fill the pockets with small candies, or papers with ideas for fun Christmas activities.  


Advent Calendar Happy Christmas Northcott panel