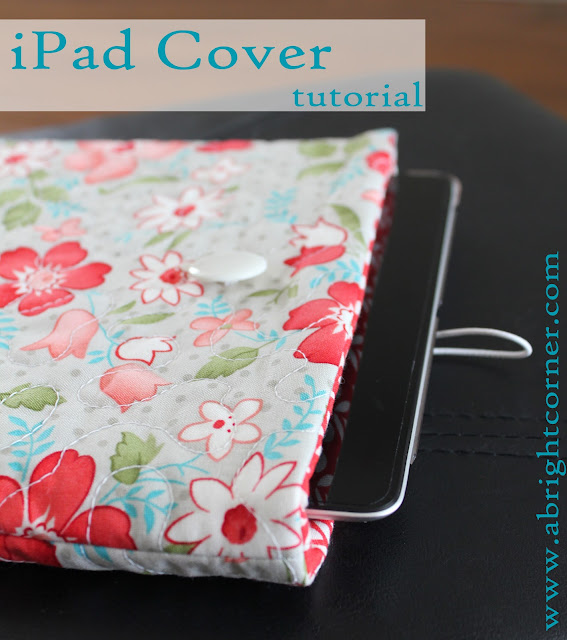
This particular cover is what I would consider a comfortable size. This is not a tight-fitting cover. I wanted it to be easy for my kiddos to use this. I can grab it on the way out the door and quickly slide the ipad in without a struggle. The elastic closure and button ensure that the iPad is snug inside and well protected. If you would like this to be a tight fit, increase your seam allowance to 1/2".
iPad Cover Tutorial
by
Andy Knowlton
Materials Needed:
2 Coordinating Fat Quarters
button
6" or so of thin elastic
thin batting
Cutting Instructions:
- From one of the fat quarters (this is for the cover lining/inside) cut 2 pieces that are 9.5" x 11.5" and then two pieces that are 4" x 10" (this is for the pieced outer cover)
- From the second fat quarter cut two pieces that are 9" x 10" (This is also for the pieced outer cover).
- Batting: Cut two pieces that are 9.5" x 11.5" and two that are at least 10" x 12"
Step 1:
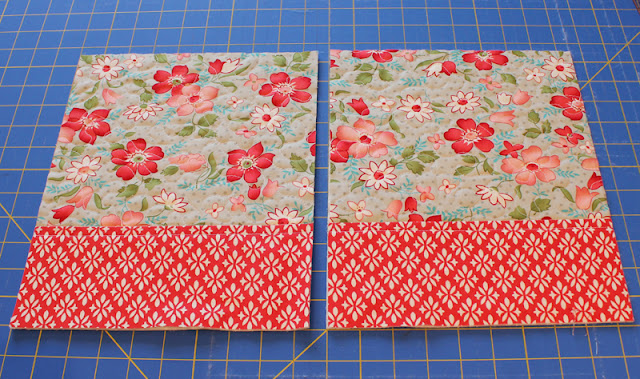
We will first make the outer cover. Sew each of the 4" x 10" pieces to the 9" x 10" pieces. Press.
Step 2:
Place the outer cover pieces over the batting pieces that are 10" x 12." Baste using a few basting pins or using a bit of basting spray.
Quilt as desired, then trim both pieces to be 9.5" x 11.5"
Step 3:
Place the two outer cover pieces together (right sides together) and pin. Be sure to line up those seam lines (see photo below). When you get the cover finished it will be obvious if these seam lines are not matched up. Sew the two outer cover pieces together (using a 1/4" seam) along the sides and bottom, pivoting at the two bottom corners. Leave the top open. Clip the corners to reduce bulk.
Turn outer cover right-side-out. Gently push out the corners (I use the tips of a blunt-edge pair of scissors. A car key would work as well.)
Step 4:
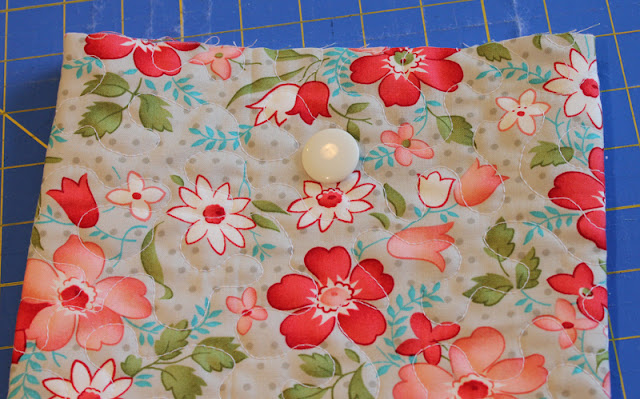
Sew on your button in the center of one side and about 2" down from the top edge.
Step 5:
Now we are going to work on the lining. Layer a piece of batting, then one of the lining pieces (right side up), then another lining piece (right side down), and then the final batting piece. The two lining pieces should be right-sides-together with the batting pieces on the outsides. Pin together around all edges.
This next step is optional - but I find it helpful! At the bottom edge of the batting, cut a notch out that is about 5" long and about 1/4" high. Trim JUST the batting - not the lining fabric. Repeat for both pieces of batting. (Cutting this notch will help reduce bulkiness when you are stitching the opening closed.)
Sew 1/4" seam along the sides and bottom of the lining/batting sandwich, stopping at the notched section of batting (or at about 2" in from each side.) Leave the notched section unsewn - this is where you will turn the cover right-side-out. Leave the top open as well. Clip the corners to reduce bulk.
Step 6:
Place the outer cover (right side out) inside the lining so that the two (inner and outer cover) are right sides together.
Match side seams and pin in place all along top edge.
Measure the amount of elastic you will need (this depends on the placement and size of your button). Place the piece of elastic loop-side-in, between the lining and outer cover on the opposite side of where the button is. Pin elastic in place.
Step 7:
Sew (using 1/4" seam) around the top edge of the cover, catching the ends of the elastic. After you have sewn around the whole top edge, trim the ends of your elastic. Mine were obviously WAY too long.
Step 8:
Through the opening in the bottom of the lining (remember that notched section of batting?) turn the cover right-side-out. Find the bottom edge of the lining that is unsewn. Fold the raw edges in about 1/4" and stitch the opening closed. This is where the notched batting helps reduce bulk and make this stitching easier.
Step 9:
Push the liner inside of the outer case. Reach in and push the corners in and smooth the liner so that it lays flat inside of the cover. I like to press the edge of the top opening to help it to lay flat as well.
And there you have it-- a personalized iPad case to take with you everywhere you go! I love mine so much, but the guys in my family had a problem with the flowers. So I made a more masculine version to appease them.


Thank You! I have been waiting for this tutorial!
ReplyDeleteThis comment has been removed by a blog administrator.
ReplyDeleteI appreciate this tutorial! The instructions and photos are great. I added a sectioned pocket to the front to hold a stylus, cleaning cloth, charger cord/earphones. Thanks very much for posting this tutorial.
ReplyDeleteHi there! Is this made to fit a regular iPad or an iPad mini? Thanks :)
ReplyDeleteThe measurements in this tutorial are for the regular iPad. Thanks for stopping by!
DeleteThis comment has been removed by a blog administrator.
ReplyDeleteThis comment has been removed by a blog administrator.
ReplyDeleteThank you so much for your wonderful tutorial. Simple and easy to follow and will make great Christmas presents.
ReplyDeleteThank YOU!
ReplyDeleteGosh this looks so simple compared to the one I made that looked wonky when I finished. My husband also didn't go for the fabric I chose so when I remake it, he is getting this version. Thanks for the great tutorial.
ReplyDeleteThank You the tutorial was easy to follow and it came out super cute !!
ReplyDeleteExplore the profiles of guwahati escorts, guwahati call girls, call girls in guwahati and
ReplyDeleteescorts in guwahati for female companionship in top rated hotels.
Get affordable escort services in guwahati hotels now.
Guwahati call girl
Escorts in Guwahati
yeezy
ReplyDeletesupreme new york
lebron shoes
supreme
chrome hearts online store
yeezy 700
adidas yeezy
golden goose
golden goose sneakers
jordan 13
Where can buy best Apple IPad Smart Cover in Uae, Apple IPad Mini Smart Cover in Uae, Pink Phone Case in Uae
ReplyDeletehttps://gccgamers.com/accessories/phone-cases/apple-ipad-mini-smart-cover-pink-mgnn2.html
Looking For Affordable Razer Keyboard Case in Uae, Apple IPad Pro Keyboard Case in Uae, Apple IPad 12.9 Inch Keyboard Case in Uae
ReplyDeletehttps://gccgamers.com/accessories/bags-sleeves-backpack/razer-keyboard-case-for-apple-ipad-pro-12-9-inch.html
Thanks for the article. Such colorful-looking covers and bags you have crafted. Recently, I brought an iphone 14 pro max wood case for my phone. It is so durable and light in weight. You can customize it and also engrave it. It is environmentally friendly and long-lasting. The texture is smooth and I went with a solid color.
ReplyDeleteThe Cash App Barcode takes seconds to scan, and the funds are instantly added to your Cash App balance. It's fast, secure, and efficient - everything you'd want from a mobile payment solution.
ReplyDeleteI find it so handy, especially when I'm out shopping or doing small business transactions. No need to worry about carrying enough cash or dealing with lengthy bank transfers. Cash App Barcode to Load Money has made my financial life a breeze.
First and foremost, I want to extend my gratitude to the author of this fantastic blog for sharing such an adorable iPad case tutorial! It's projects like these that make the creative journey all the more enjoyable.
ReplyDeleteHow to Find Dead Airpods
off white jordan
ReplyDeletegolden goose outlet
hermes outlet
goyard bag
goyard
Brilliant information here! Hopefully you wont stop the flow of such magical material!
ReplyDeleteصيانة افران بالاحساء doC6BlEtye
ReplyDeleteCool
ReplyDeleteGreat blog on trendy mobile covers for girls! If you're looking for more stylish and affordable options, check out this collection of the best mobile covers for girls — definitely worth a look!
ReplyDelete