Trick or Treat Bag Tutorial
by Trisha Weekes
Materials
needed:
½ yard of
outside fabric
½ yard of
liner fabric
1 fat
quarter of choice
*optional-2
yards of jumbo ric-rac
Thread
note: please read through all steps before beginning any project
Step one:
Start by
squaring up your fabric, making sure you have 2- 18”x42” rectangles (18”x21”
folded) removing the selvedge edges.
From the fat
quarter cut 2- 4”x22” strips, these are for our handles.
Step two:
(a) Fold the
4”x22” strips in half lengthwise, right sides together.
(b) Sew a ¼” seam
lengthwise down both strips of fabric.
(c) Open and Press seams.
(d) Turn each strip so
right sides are out.
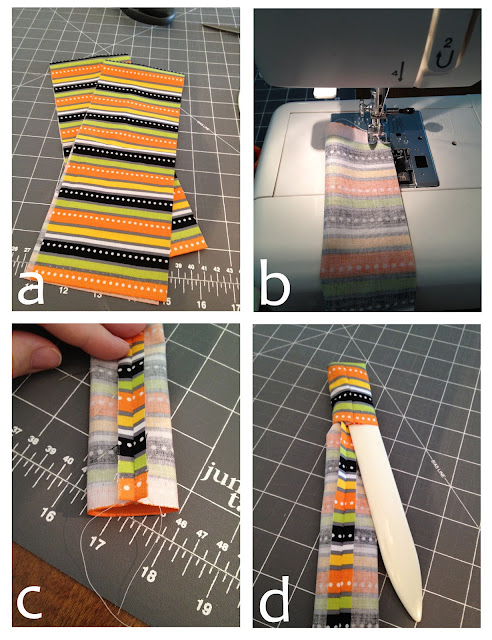
Press so the seam is running down the middle, turn over and top stitch ¼” on each side of the handle. Repeat until both handles are complete.
Step three:
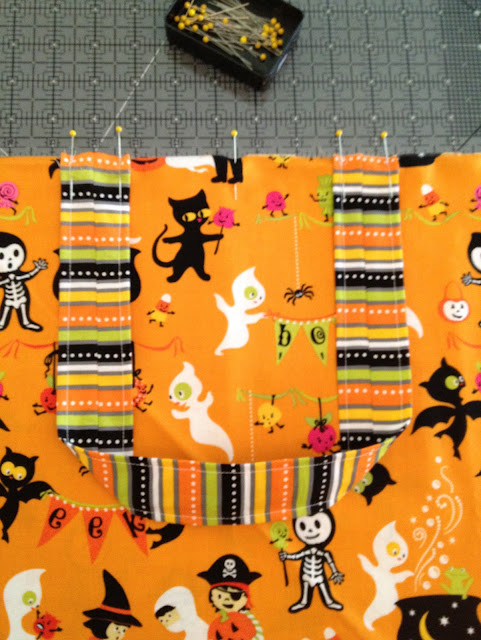
Pin handles
onto the top outside of selected fabric, at 8” in and 14”in from the side. You
want the seam on the handle to be facing the liner fabric. Fold fabric over and
using the first handles as a guide pin the other handle to the other side. Then
place the lining fabric to the outside of fabric (right sides together) and
sandwich the handles between the two fabrics.
Pin, then sew a ¼” seam along the top of both fabrics, back stitching over the handles to secure them between the two fabrics.
Step four:
Open and
press this seam, then fold the fabrics in half lengthwise (right sides together
still). Liner fabric facing liner fabric and outside facing outside. Sew a ¼”
seam down the side. Open and press this
seam.
Fold back over the outside fabric (so the right sides out), line up the raw edge of the outside with the bottom of raw edge of the liner fabric (wrong sides together). At this step you have the option to add a heavy interfacing to the bag, we've left it out of our bag. Sew a ¼” seam around the bottom opening, just the two layers not the four total layers. Then zig-zag stitch the raw layers to prevent fraying.
Step five:
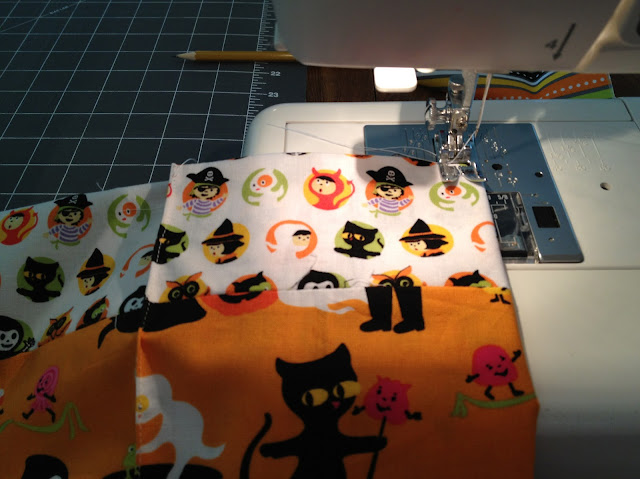
Now we're going to create the border at the top of the
bag, by shifting the two fabrics about 2”. By doing this it creates a unique
layer, we get to see the liner fabric at the same time as the outside, but also
creates the bottom of the bags guides and seams.
*Please note: that with my
fabric, the liner fabric as seen from the outside of the bag is going the right
direction, but when looking down into the bag it is upside down. If you have
chosen a directional print you will need to sew your liner fabric upside down
in the previous steps as well*
Step six:
Open up the bottom opening and fold it on the seams, fold in the ends like you would a present, forming a triangle on both ends.
With a ruler and pencil we're going to mark the sides- line up the ruler with the triangle to the top of the bag and make a light line. Do all four sides; after the first two, flip it over refold triangles and draw lines.
Fold and sew an 1/8” seam
down each of the lines drawn.
Step seven:
Fold the bag in
half horizontally, lining up side seams and handles. Turn the bag inside out so
the liner is facing out. We're going to sew up the bottom- line up the fabric
(should be the outside fabric folded over, no raw edges).
Sew a ¼” seam, then zig-zag stitch to reinforce the bottom.
Step eight:
Open up the bottom seams again, with the triangles poking to the
outside of the bag. Along that seam you're going to sew, this will create the
bottom sides of the bag. Repeat on the other side.
Next we'll fold in the triangle and following the seam we'll stay stitch the triangle in place on the bottom of the bag. Repeat on the other side.
Step nine:
Back up to the top of the bag, we're going to top stitch (¼”) around
the top and top stitch the handles down to the bag.
Next stabilize the handles by making X's as shown in the picture.
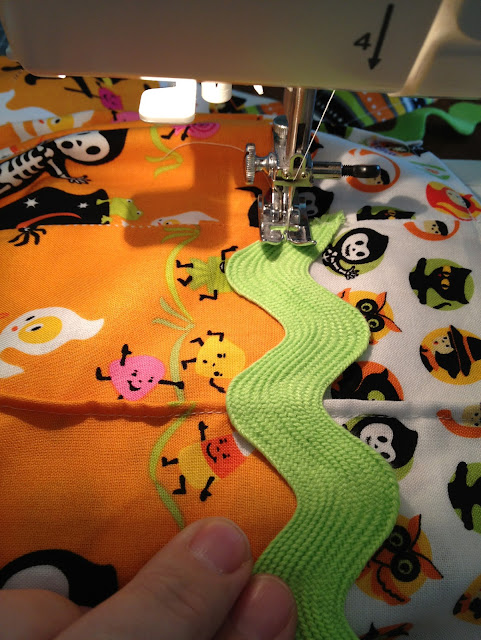
The ric-rac is optional, if you want you can leave it off. To add the ric-rac, line it up with the outside/ liner seam starting at a side, stitch through the middle of the ric-rac securing it to the bag all around the bag.
Step ten:
Give this bag to a kid, who is willing to go door to door and ask for a
trick or a treat! Enjoy a bag full of treats!


